I took some screenshots to accompany my Vim as an IDE repo on GitHub. This is by no means a complete walkthrough! It’s just a reference for those who are curious if they installed everything correctly. This is what my system looks like for me after each step.
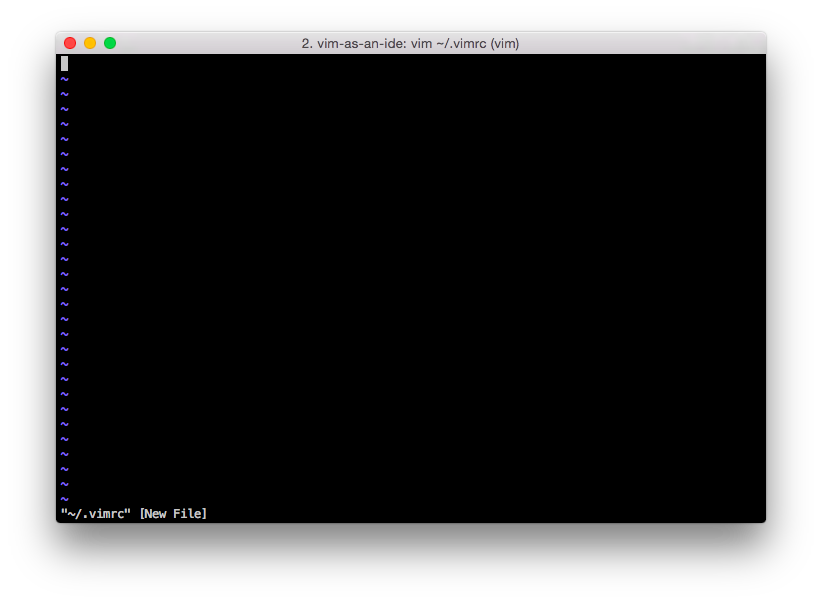
1. Create vimrc file
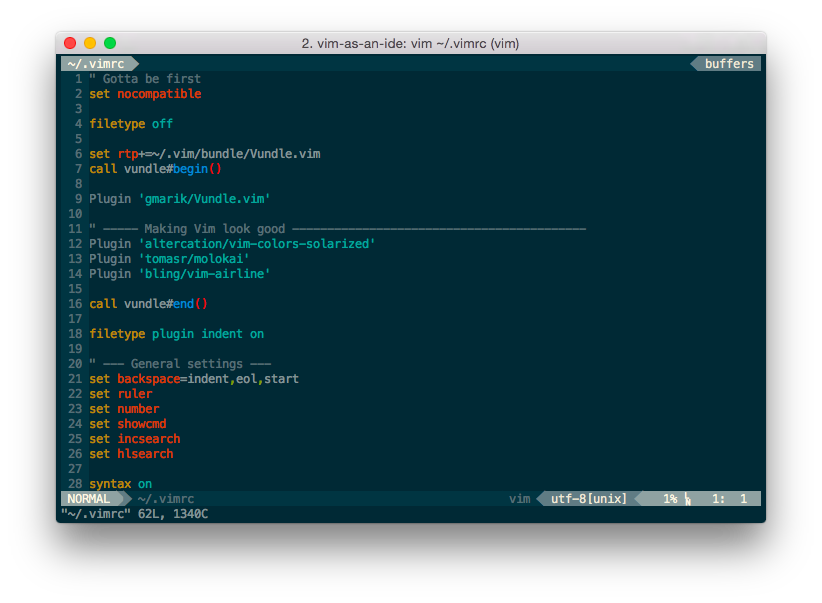
This is what Vim should look like immediately after opening it:
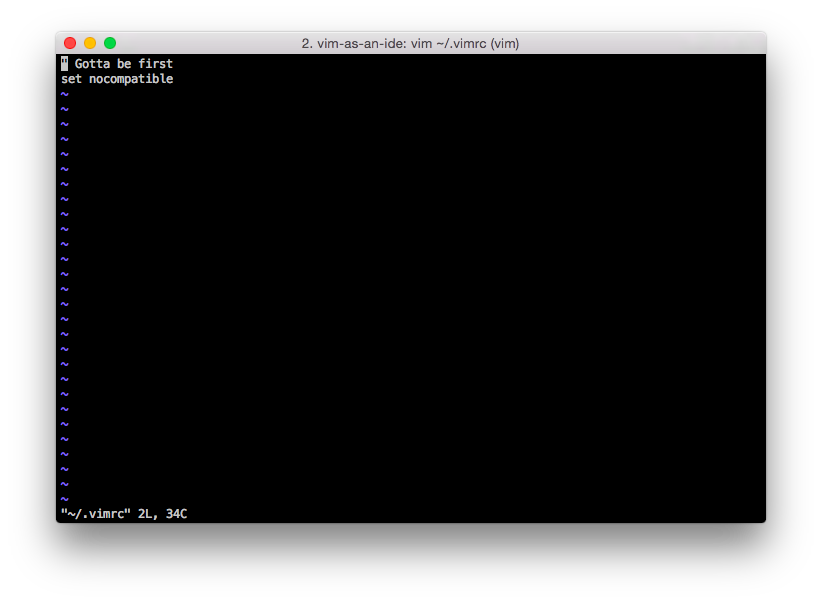
And right after adding the two lines:
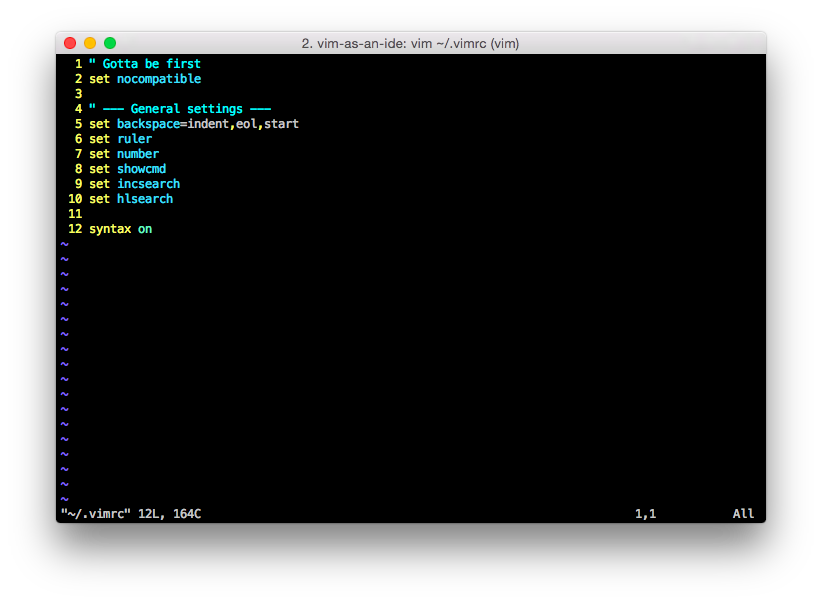
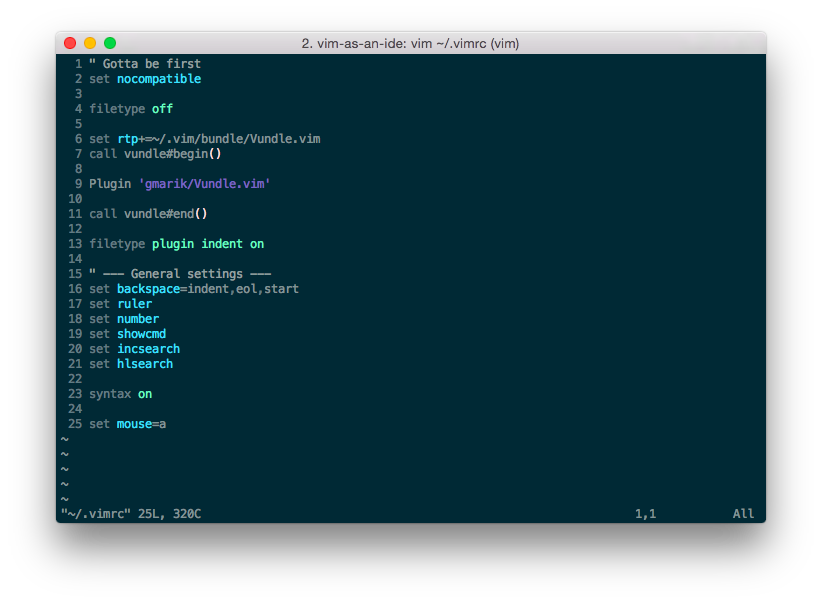
2. Add some general settings
After you add these settings, your ~/.vimrc should look like this when opened in Vim:
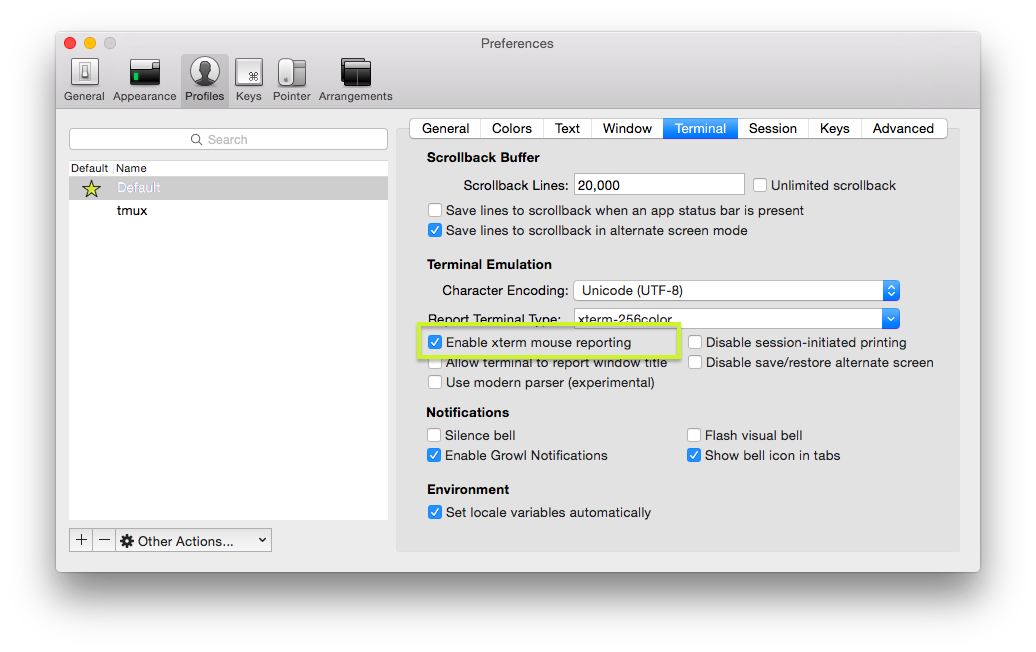
3. Enable the mouse
To enable the mouse, you’ll have to figure out where the appropriate setting is in your terminal emulator. Here’s a screenshot of where it is in iTerm2 on OS X.
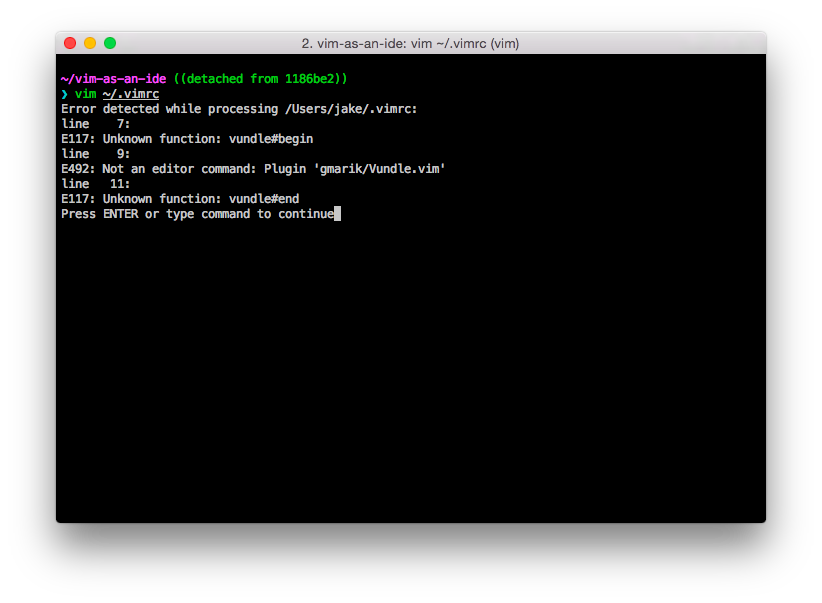
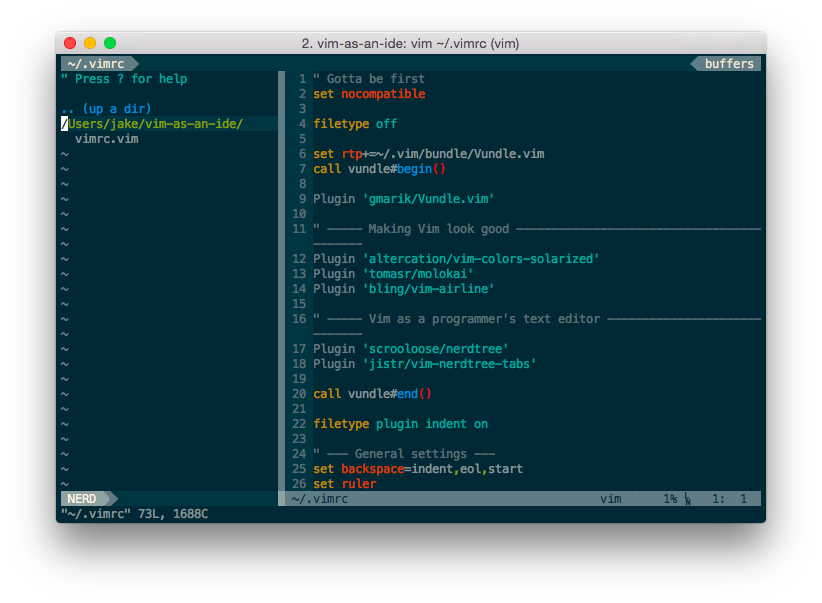
4. Set up Vundle boilerplate
If you add the changes introduced at this step before installing Vundle, you’ll get an error that looks like this:
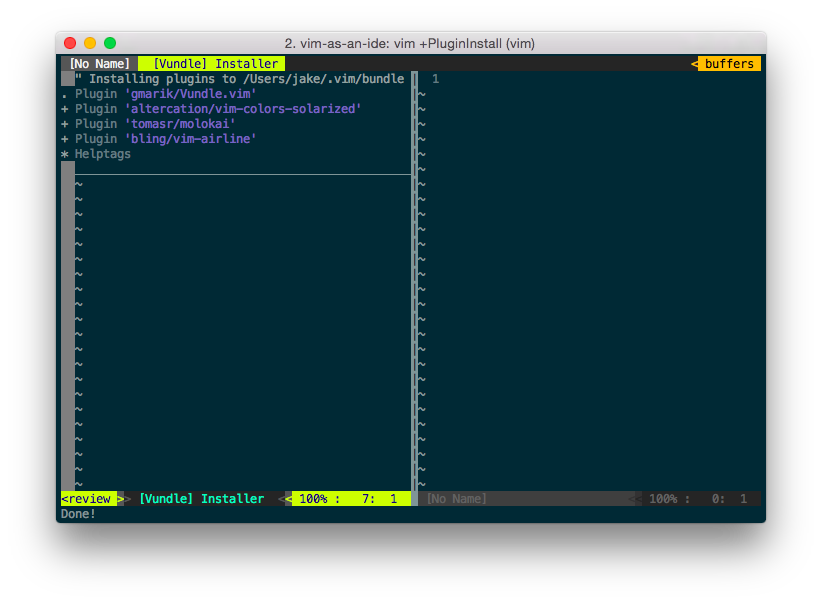
Otherwise, this should be the result of running vim +PluginInstall to install Vundle for the first time:

Remember, you can use :qall to quit Vim after installing plugins.
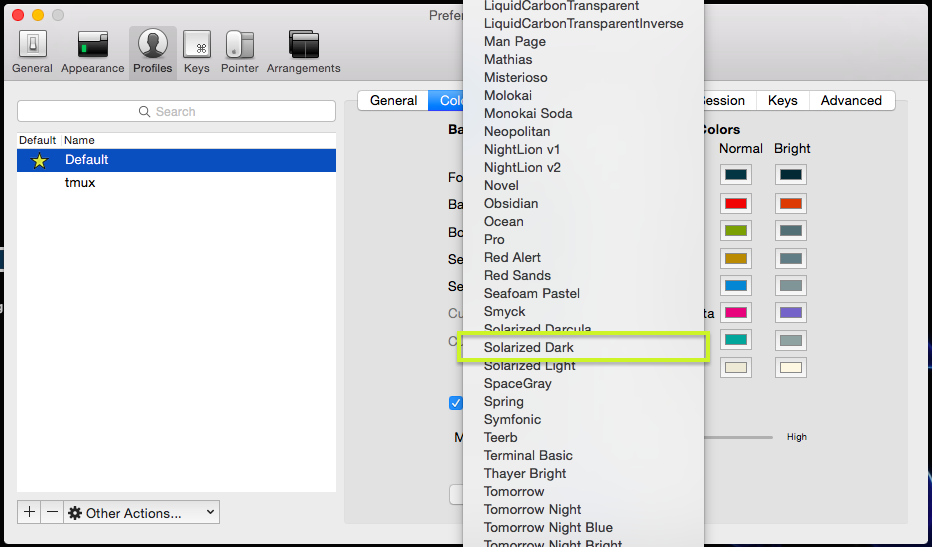
5. Make Vim look good
Your experience might diverge a little bit from these screenshots if you choose a different colorscheme because I’ll assume you’re setting everything up using Solarized Dark. If you’re on a Mac and you’ve imported the iTerm2 colorschemes, you should be able to find the Solarized Dark theme here:
Making that change should make Vim turn these colors:
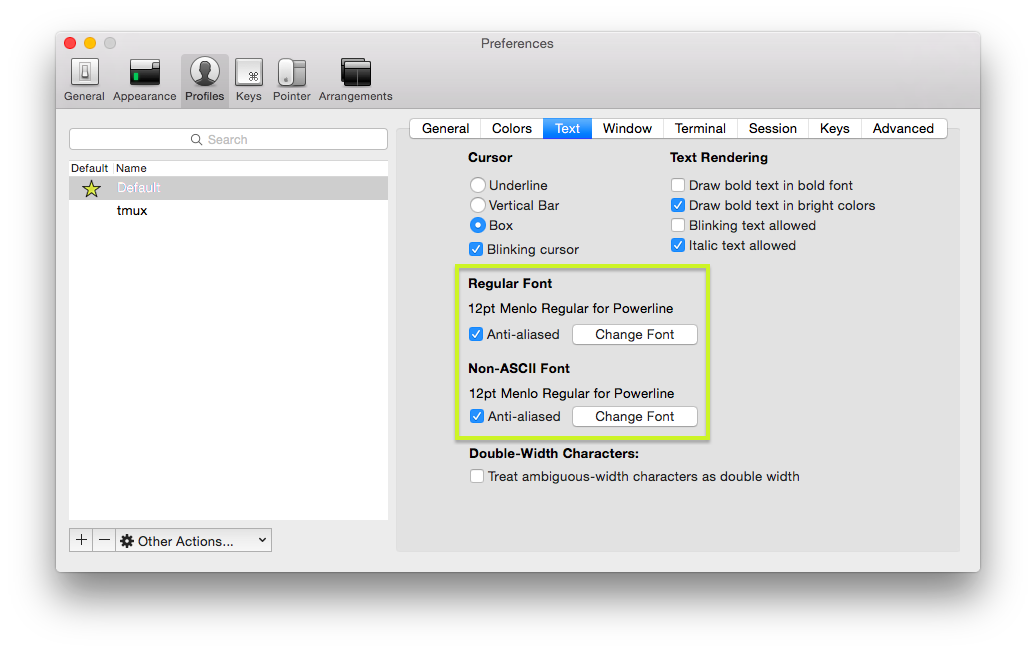
Next up is changing your font to a Powerline patched font. If you downloaded and installed Menlo for Powerline correctly, you should be able to set it using this panel in the preferences:
Finally, running vim +PluginInstall to install the Solarized Vim colorscheme and vim-airline:
Here’s what the Vim solarized plugind does to our ~/.vimrc:
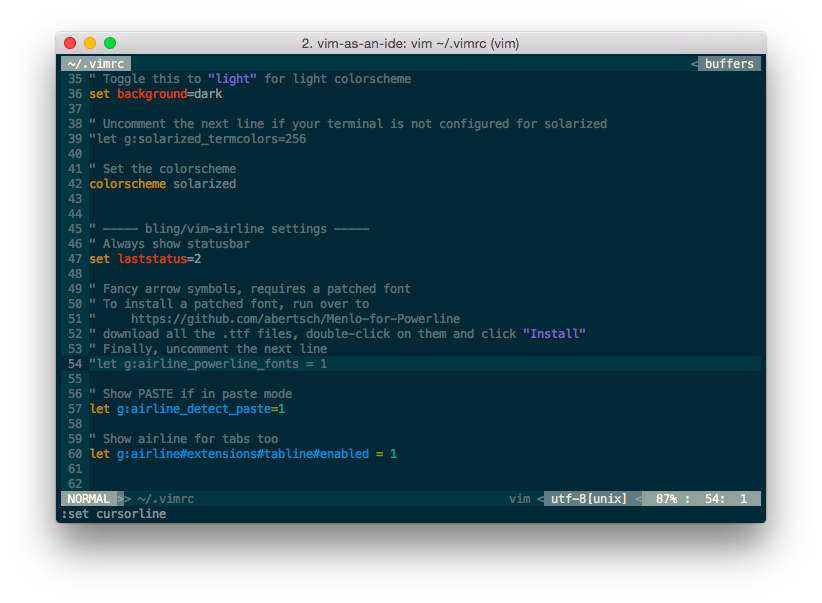
If you chose to install a Powerline patched font, you can let vim-airline use cooler arrows by uncommenting the line highlighted in this screenshot above, to make Vim look like this:
6. Plugins NERDTree and NERDTree Tabs
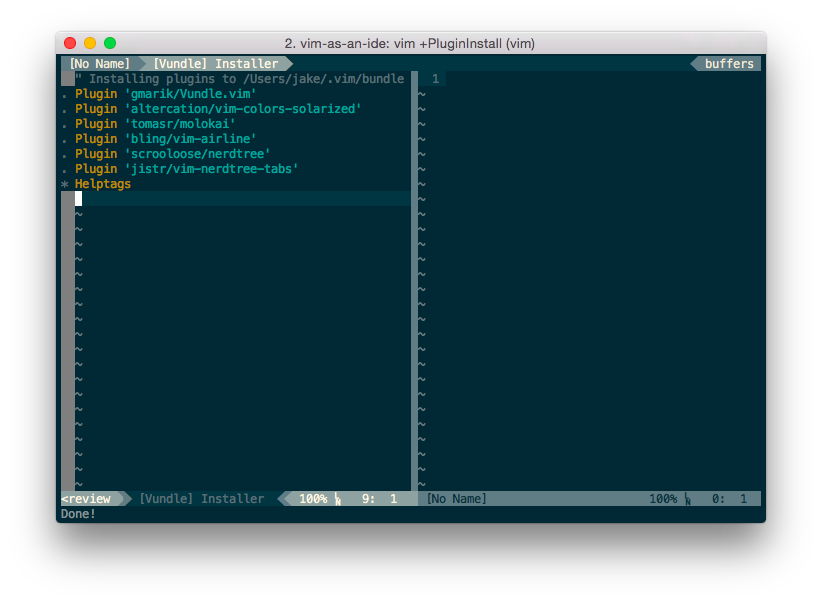
This will be the last time that I demonstrate running vim +PluginInstall, because they’ll all basically look the same from here on out:
Once you’ve installed NERDTree and NERDTree Tabs (and added the settings I listed for them), you should be able to type \t to bring up something that looks like this:
7. Plugin Syntastic
Once you’ve installed Syntastic, it should syntax highlight your errors by displaying little marks next to the offending lines:
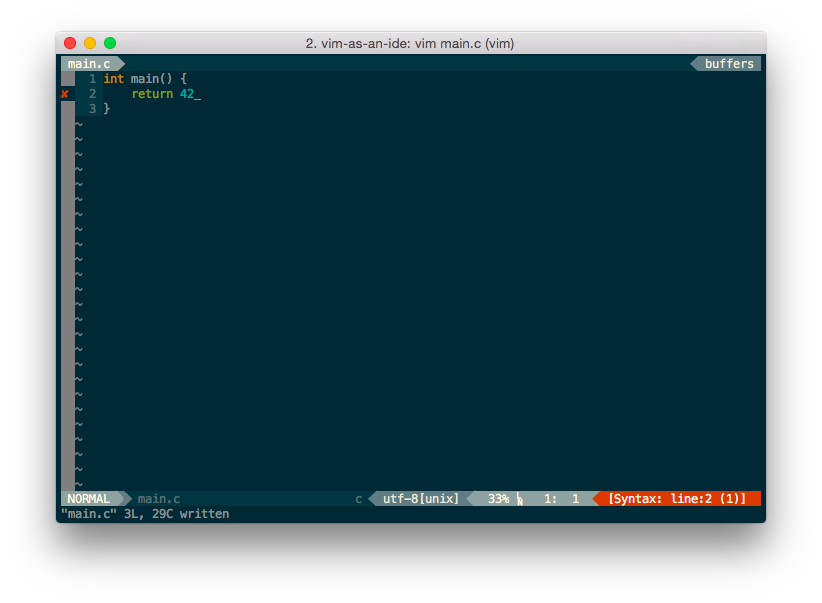
You can see that we’ve forgotten a semi-colon, and Syntastic is pointing that out for us.
As I was making these screenshots, I realized that I forgot to include a setting in the right place. It’s fine if you work through the whole workshop, but if you pick and choose things, namely if you don’t follow the steps for vim-gitgutter eventually, you’ll end up with this weird highlighting in the sign column. To disable this highlighting, you can either wait until the vim-gitgutter step (coming right up in 4 steps), or you can run this command (the one at the bottom of the screenshot):
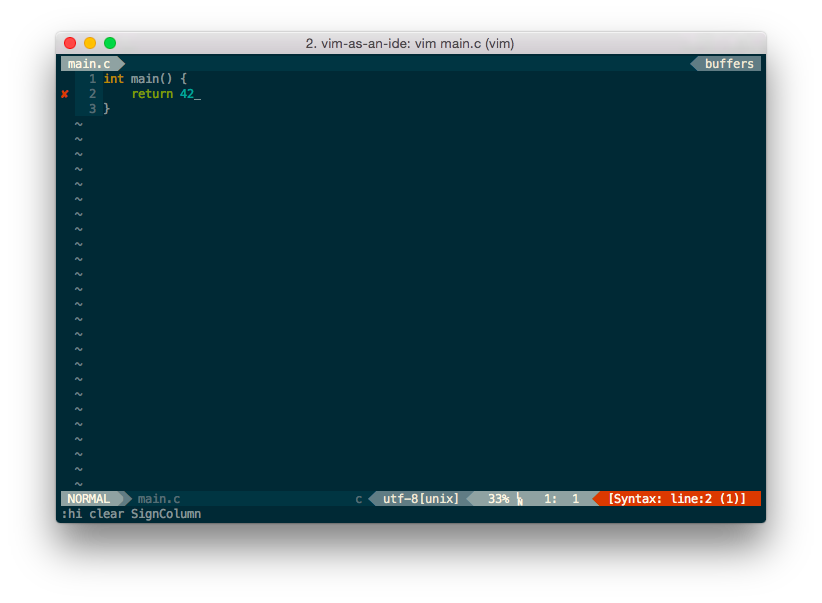
To make the change permanent, you’ll have to add that line (:hi clear SignColumn) to your ~/.vimrc.
8. Plugins vim-easytags and tagbar
After this step, you should be able to bring up a split pane view that shows your functions, variables, and other identifiers by pressing \b:
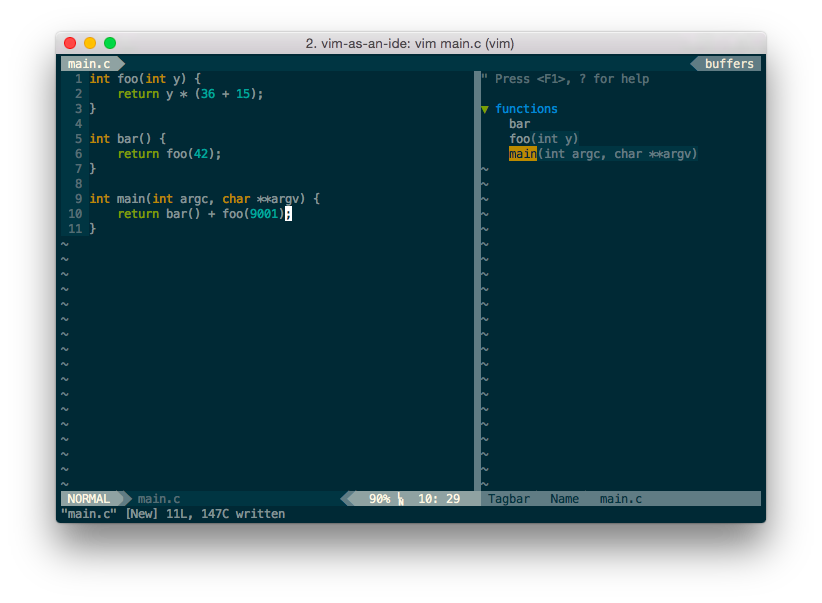
If you enabled mouse reporting, you should be able to click on the things in the pane and jump to the appropriate place in the file. I’d strongly recommend that you read the help for all the keybindings and actions you can use with it.
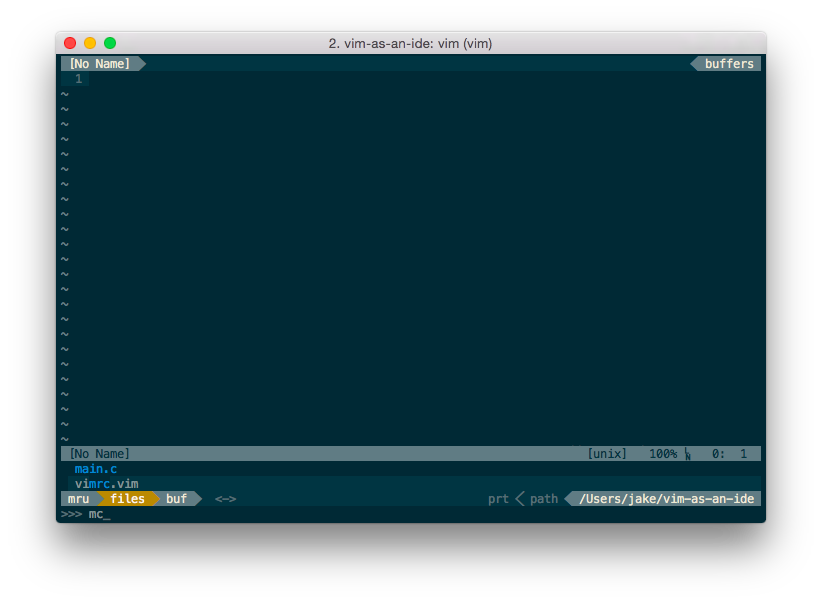
9. Plugin ctrlp
When CtrlP is installed, you can press Ctrl + P to bring up a list of files. As you type, the list will be filtered to only those that “fuzzy match” what you’ve typed in. As you can see, I typed in mc, which matched vimrc.vim and main.c:
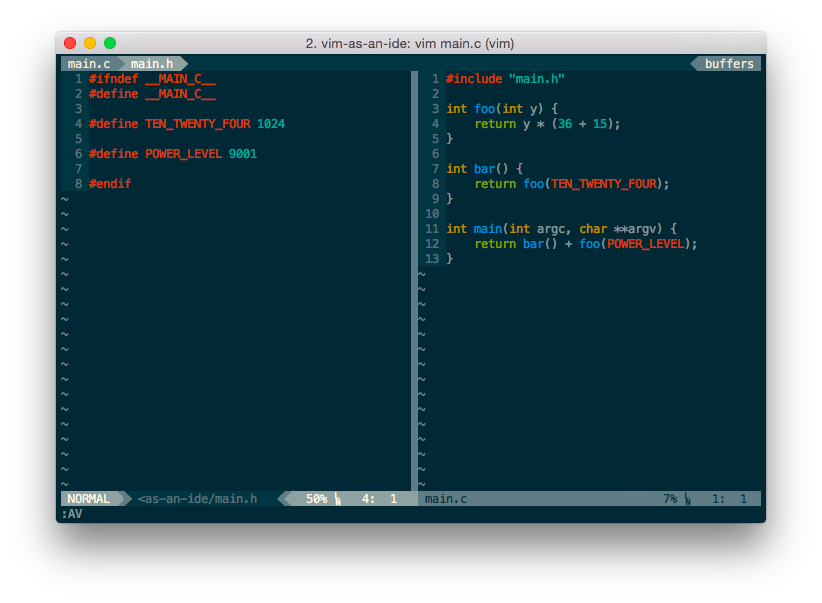
10. Plugin A.vim
This plugin introduces a number of commands that you can read in the documentation that enable opening “alternate” files, like C/C++ header files, really quickly. I’ve run :AV here as an example of one of the commands it installs, which opens the alternate file in a vertical split pane.
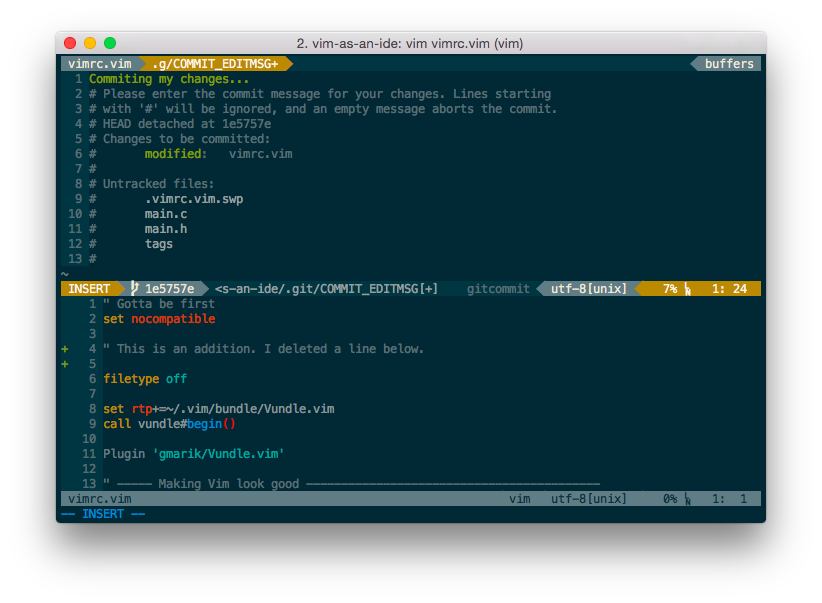
11. Plugins vim-gitgutter and vim-fugitive
vim-gitgutter is really handy: it shows you a +, -, or ~ next to lines that have been added, removed, or modified. This is good for both identifying the pieces of code that have changed while you’re working on a file as well as reminding yourself that you have changes that need to be commited.

Speaking of committing files, vim-fugitive lets you make Git commits from right within Vim. Simply run :Gcommit to bring up a split pane where you can craft your commit message:
vim-fugitive can do much more than just make commits. Be sure to read the appropriate documentation to figure out what sorts of cool things you can do!
12. Plugin delimitMate
Finally, using delimitMate you should be able to type an opening delimiter and have the closing one be inserted automatically. Here’s an example on parentheses:
13. Plugin vim-superman
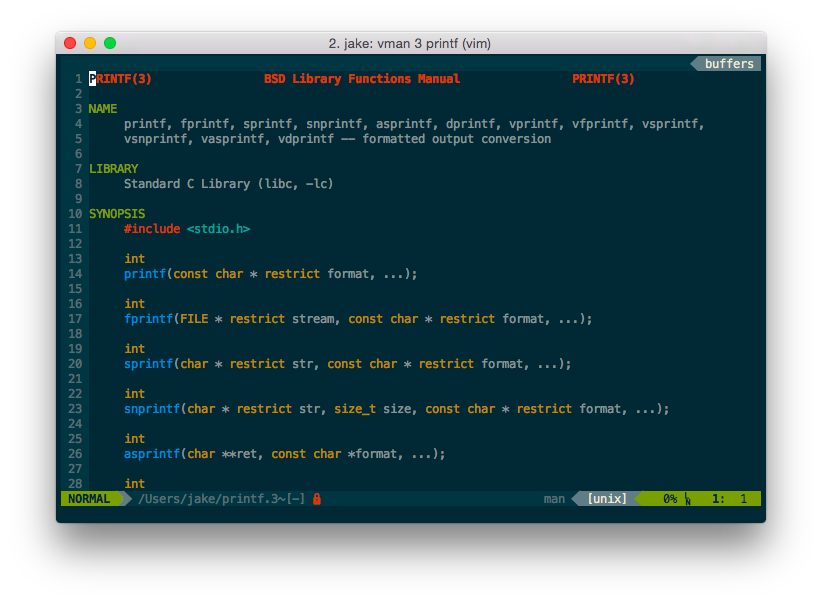
Once you’ve added the appropriate function to your shell initialization file (~/.bashrc, etc.), you should be able to run vman <command> to open man pages. Here’s an example on vman 3 printf:
14. Plugin vim-tmux-navigator
There’s not much to show here, as this step is mostly just introducing keybindings. If you use tmux, make sure to copy the appropriate snippet into your ~/.tmux.conf to be able to jump between tmux and Vim splits with no added effort.
15. Syntax plugins
No screenshots again. What syntax highlighting plugins you end up installing is largely up to you.
16. Add all the extra plugins that I use
For these plugins, be sure to check the documentation. Most of them have screenshots that show what they look like when installed and configured correctly.
Wrap Up
That’s it! I can only take you so far in making your Vim awesome. You have to take yourself the rest of the way by investing a little bit of effort into reading the documentation for the plugins you think could be useful to you so that you can fully utilize them. Be sure to comment on the commits with questions if you’re stuck or are wondering why your setup doesn’t look similar to one of the above!